
In the 2nd part of this 3 part series, we’re going to build upon the functionality from part one, which you can find here. We’re going to add extra logic for recording different resolutions and frame rates, the ability to change the brightness and contrast, and we’re going to top it off with a better way to handle the separate FFMPEG process whilst giving the user more information as to what’s going on.
The first thing we’re going to look at doing is allowing for the changing of the resolution and frame rates. As these two are tied together, I’m opting for a pre-defined config approach as modifying them incorrectly can lead to the camera not recording. Using the Pi Camera encoding chart here, we can define a few set configs which we know work. This includes 1920×1080@30 fps, 1280×720@60 fps and 640×480@90 fps. In code, we can accomplish this with a simple enum.
class CaptureInfo(object):
	"""
	Combos for CaptureInfo such as frame rate and resolutions
	"""
	VIDEO_1080p_30 = (1920, 1080, 30)
	VIDEO_720p_60 = (1280, 720, 60)
	VIDEO_640p_90 = (640, 480, 90)
With these combo’s we need a way to set them on the API, and one great way to do this is by having it as a kwarg on the PiCamera constructor, where it just passes it into a public method to set it. This way we can ensure that the camera is always using one of those configs.
The method to set the camera’s resolution and frame rate is very basic, doing nothing more than unpacking the tuple and setting those values on the camera.
def setCameraInfo(self, captureInfo, stopRecording=True):
    	"""
    	Set the camera's info, such as the frame rate and resolution

    	args:
        	captureInfo (CaptureInfo): The Camera info package to set

    	kwargs:
        	stopRecording (bool): If the recording should be stopped before this change is applied
    	"""
    	if stopRecording is True and self._cameraStatus == PiCameraStatus.RECORDING:
        	self.stopRecording()
    	width, height, rate = captureInfo
    	self._camera.resolution = (width, height)
    	self._camera.framerate = rate
Adjusting the brightness and contrast with the PiCamera library can be done but setting the value of the brightness and contrast attributes. Getter and setter methods were added to wrap them as well to emit the cameraBrightnessChanged and the cameraContrastChanged signals when needed.
In part 1, I opted to use subprocess for the transcoding from h264 to mp4. While this works, it has a few downsides, such as blocking the main thread or not being able to get the output and any errors. A better solution is to use QProcess, as this does not block the main thread and signals are emitted when the process is complete, allowing for us to carry on working with camera and recording data without having to wait for the transcode to finish.
Another small change is the adding of the timecode to the ffmpeg which will stamp the video file with SMPTE. This is somewhat of a hack as the camera runs on its own internal clock and so the timecode is coming from the system clock. Whilst it’s close to the actual timecode, it’s not frame accurate.
    def saveRecording(self, outputPath):
    	"""
    	Save the recording
    	"""
    	if not os.path.exists(self._TEMP_FILE):
        	raise ValueError("No Recording to save!")

    	if not os.path.exists(os.path.dirname(outputPath)):
        	os.mkdir(os.path.dirname(outputPath))

    	proc = QtCore.QProcess()
    	proc.finished.connect(functools.partial(self._handleRecordingTranscodeFinish, proc, outputPath))
    	ffmpegArgs = [
        	"-nostdin", # Make sure that FFMPEG isnt waiting for any user input
        	"-y",  # override file
        	"-framerate", str(self._camera.framerate), # Set the frame rate
        	"-i", self._TEMP_FILE, # Define the input file
        	"-c", "copy", # Tell FFMPEG to copy the memory rather than encode and decode it
        	"-timecode", self._startTime,  # Set the start timecode to chase
        	outputPath] # Output file path
    	proc.start("ffmpeg", ffmpegArgs)
    	self.recordingSavedStartProcessing.emit()

	def _handleRecordingTranscodeFinish(self, process, outputFile, exitCode):
    	"""
    	Handle the saving/processing task finishing and reporting on the outcome

    	args:
        	process (QProcess): The process that was run
        	outputFile (str): The output file path
        	exitCode (int): The exit code of the process
    	"""
    	if exitCode == QtCore.QProcess.NormalExit:
        	self.recordingSaveFinishedProcessing.emit(outputFile)
    	else:
        	errorMsg = "\n".join([
                        	"Error running ffmpeg.",
                        	"StdOutput: {}".format(process.readAllStandardOutput()),
                        	"StdError: {}".format(process.readAllStandardError())
                    	])

        	self.recordingSaveErrorProcessing.emit(errorMsg)
With all the extra logic going on, it makes sense to extent out the signals this class has, allowing for a UI based log to display more information as to whats happening.
class PiCameraWrapper(QtCore.QObject):
	"""
	A Qt aware wrapper around the Pi's camera API

	Signals:
    	cameraStatusChanged (PiCameraStatus): Emitted when the camera's status changes
    	cameraBrightnessChanged (int): Emmited when the camera's brightness is changed
    	cameraContrastChanged (int): Emmited when the camera's contrast is changed
    	recordingStarted (): Emitted when the recording is started
    	recordingStopped (): Emitted when the recording is stopped
    	recordingSavedStartProcessing(): Emitted when the recording is saved, start to transcode
    	recordingSaveFinishedProcessing (str): Emitted when the recording is saved, finished transcode. has final filename
    	recordingSaveErrorProcessing (str): Emitted when the processing of a save file errors out. Has the error text
    	newPreviewFrame (QImage): Emitted with a new Preview Frame
    	cameraError (str): Emitted with any camera error
	"""
	cameraStatusChanged = QtCore.Signal(object)
	cameraBrightnessChanged = QtCore.Signal(object)
	cameraContrastChanged = QtCore.Signal(object)
	recordingStarted = QtCore.Signal()
	recordingStopped = QtCore.Signal()
	recordingSavedStartProcessing = QtCore.Signal()
	recordingSaveFinishedProcessing = QtCore.Signal(object)
	recordingSaveErrorProcessing = QtCore.Signal(object)
	newPreviewFrame = QtCore.Signal(object)
	cameraError = QtCore.Signal(object)
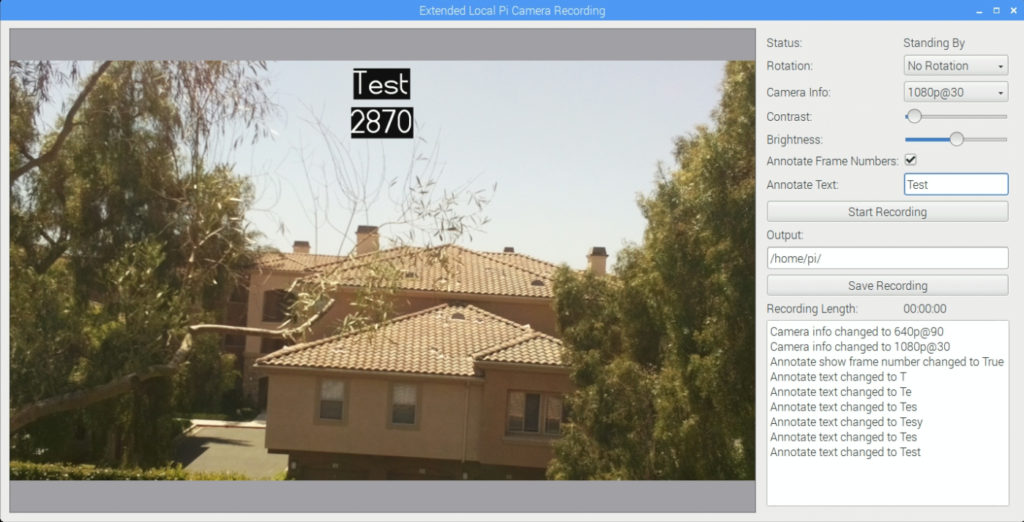
With all these great changes in the wrapper class, we just need to make some small adjustments to the UI interface to expose them, with a drop down for the camera config type, some sliders for the brightness and contrast and a text block for the log information coming from the camera.
When it comes to hooking up the actions to the log, I find it better for the buttons to edit the camera, which then emits a signal and the log picks up that signal. It adds some extra cycles but it means that the log is only recording what actually changed, rather than what should change, which in my experience can save hours of debugging!
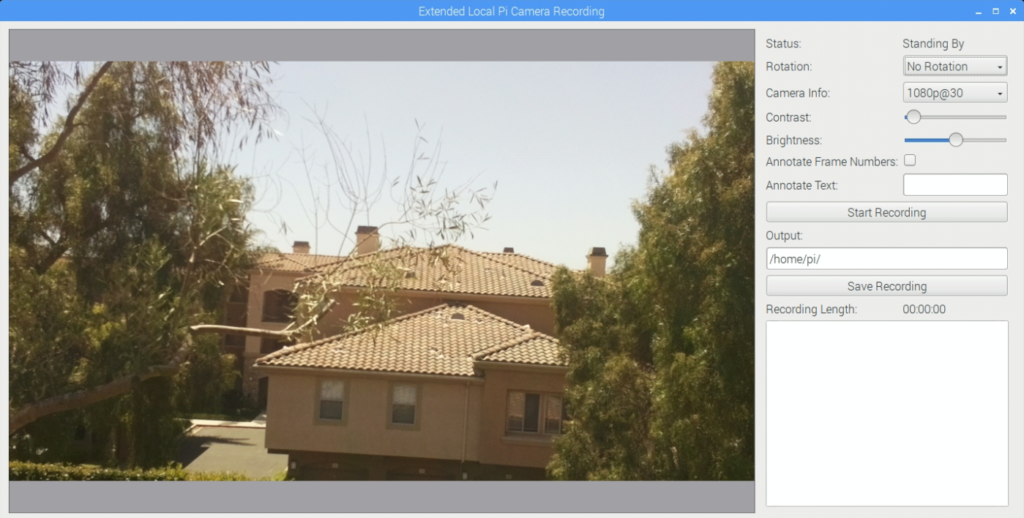
By changing the contrast and brightness sliders, you can see the effect in both the preview image and in the log.
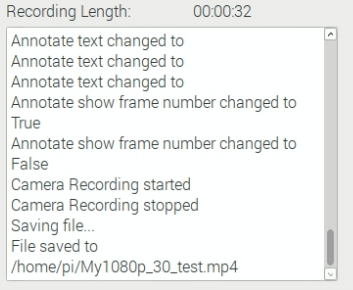
One last addition that I added was a separate QTimer thread that would trigger every 1000ms (1 second) and update the current recording length in seconds each time its run, so the user can see how long its been recording for. In the past i’ve tried multiple ways of accomplishing this, such as recording the start time stamp and calculating the delta, but due to the inaccuracies of the QTimer, there were many instances of it being called before the next second or after, resulting in a very stuttering effect which was offputing and looked like the application had frozen.
In the last part of this 3 part series, we move this all to be network based, showing just how easy it is to use Qt’s networking bases to make this a reality
– Geoff
1 thought on “Remotely capturing on the Pi – Part Two”
Comments are closed.